Authenticated Port Forwarding
About this Document
In this document, we explain how to configure authenticated port forwarding on the AXS GUARD appliance. We use the RDP protocol as an example. This document was last updated on 1 Oct 2018.
Procedure
-
Log in to the appliance and go to Network > NAT > Port Forwarding.
-
Add an new port forwarding rule for RDP. This will automatically create a
stat-portforwardrule under Firewall > Policies > Static.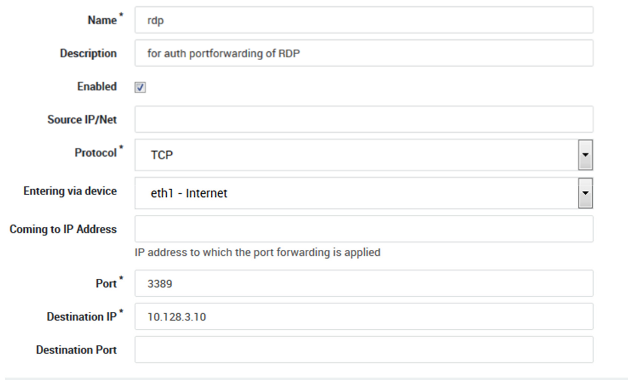
-
Go to Firewall > Rules > Through.
-
Create an additional firewall rule
rdp-drop.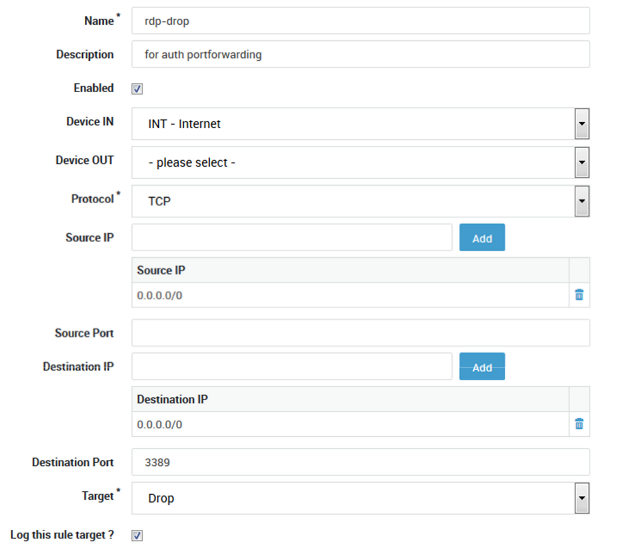
-
Create a new dynamic firewall policy
rdp-allow-pol. -
Add the
pf-rdprule created in step 2 to the policy.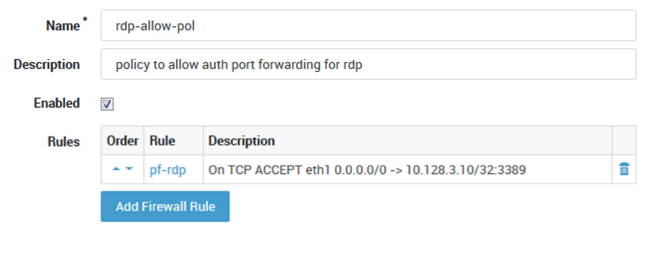
-
Add the new dynamic policy
rdp-allow-polto the group of which the user is a member.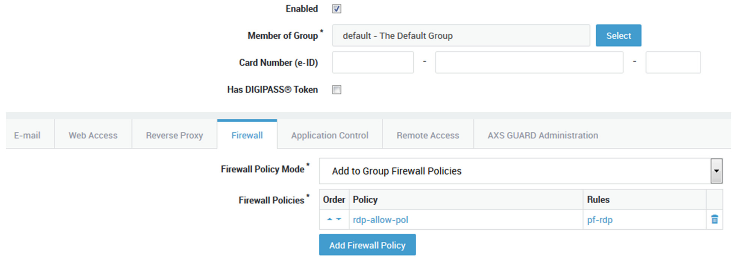
-
Create a new static firewall policy
drop-rdp-in. -
Add the
rdp-droprule created in step 4 to the policy. -
Place the policy above the static policy
stat-portforward.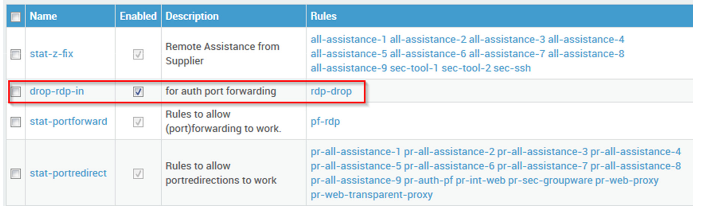
-
Go to Authentication > General and enable
Use secure Firewall and Web Access authentication.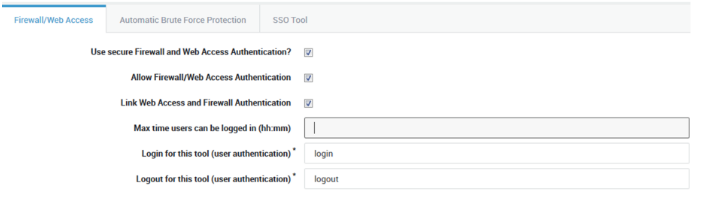
-
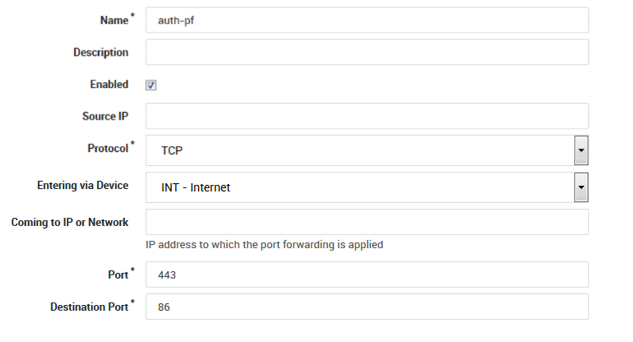
Go to Network > NAT > Port redirection.
-
Create a port redirection rule as shown below.
-
Point your browser to the WAN IP of the AXS Guard appliance and log in, e.g.
https://x.x.x.x/login. You will be redirected to port 86. -
Leave the browser window open.
The user is assigned an additional firewall policy (rdp-allow-pol)
which is only activated when the user is authenticated.
