PAX Industrial
About
The PAX AGi200 Industrial remote management solution is specifically designed to securely monitor and control all your industrial assets and IoT equipment, allowing you to improve operational processes at the same time.
Getting Started
Prerequisites
The PAX Industrial unit must be preconfigured by a system administrator to be operational. Contact your system administrator if you have any questions.
Supported Connection Modes
-
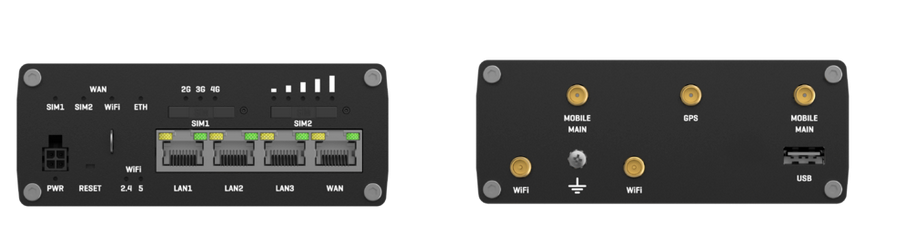
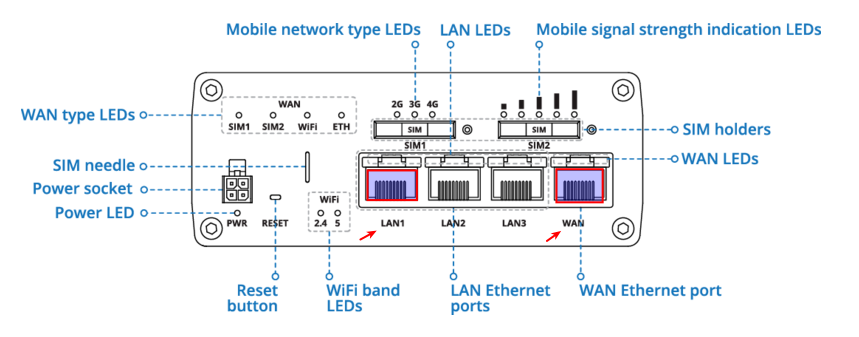
Ethernet Mode: The PAX industrial unit connects either directly to your IoT equipment via an Ethernet cable or to a switch on the same network.
-
Wi-Fi Mode: The PAX unit functions as a wireless access point. Configure your IoT equipment accordingly.
Ethernet Mode
Network Connection
-
Connect one of the LAN ports to your network switch.
-
Connect the WAN port to your Internet router.
Starting up the PAX Unit
-
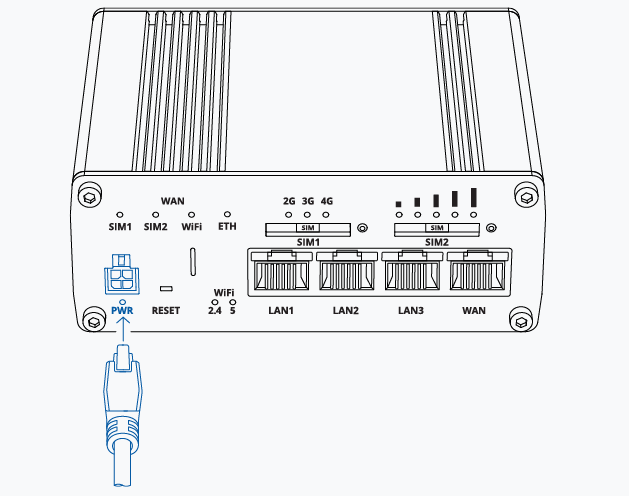
Connect the External PSU 18W power supply to the power connector of the PAX Unit.
Power Connector No. Description Wire Color 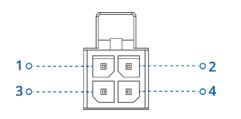
1 Power Red 2 Ground Black 3 I/O Green 4 I/O White -
Plug the power cord into a power outlet.
-
Wait until the device is fully booted (this takes approximately 2 minutes).
Configure your PC
-
Make sure your client PC is connected to the same network used by the PAX unit.
-
Disable all wireless connections on your PC.
-
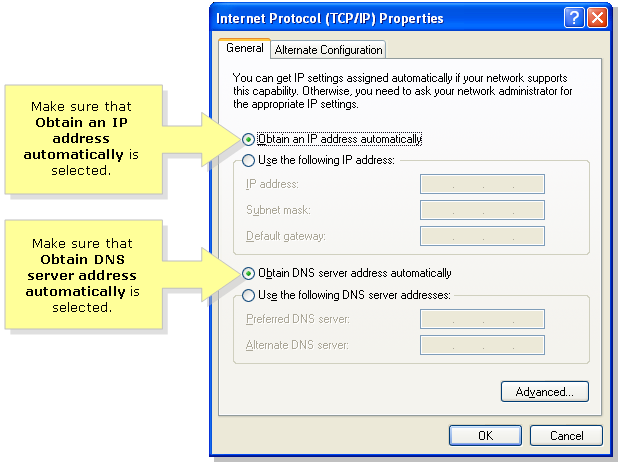
Configure your client PC to automatically obtain an IP and DNS server address.
-
Wait until you get a notification that your PC is successfully connected to the network.
Wi-Fi Mode
About Wireless Connections
The Wi-Fi option must be enabled and configured by your system administrator to allow wireless connections. Contact your system administrator for additional information.
Setting up Wi-Fi
-
Disable all wireless connections on your PC.
-
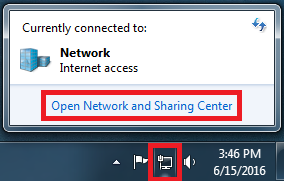
Select the Network or Wireless icon in the notification area.
-
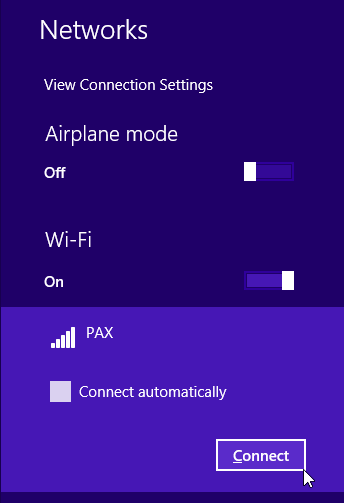
In the list of networks, choose the network ID of your PAX unit (The network ID must be provided by your system administrator) and select connect.
-
Type in the security key provided by your system administrator.
Support
If you encounter a problem
If you encounter a problem with AXS Guard, follow the steps below:
-
Check the troubleshooting section of the feature-specific manual.
-
Check the knowledge base on this site for information about special configurations.
-
If no solution is available in any of the above sources, contact your AXS Guard vendor.
Contact Information
(+32) 15-504-400
support@axsguard.com