L2TP with PSK (Windows)
Introduction
Before you start
The IPsec and L2TP features must be enabled on your AXS Guard appliance. Verify that the IPsec server is configured to accept proposed client IPs. Go to Authentication > Services to configure the L2TP authentication policy. Ensure that users are allowed to use the L2TP service. See the L2TP how to for additional information.
L2TP and NAT-Traversal
By default, Windows Vista, 7 and 8 and the Windows Server 2008 operating systems do not support Internet Protocol security (IPsec) network address translation (NAT) Traversal (NAT-T) security associations to servers that are located behind a NAT device. Therefore, if the virtual private network (VPN) server is behind a NAT device, a Windows Vista-based VPN client computer or a Windows Server 2008-based VPN client computer cannot make a Layer Two Tunneling Protocol (L2TP)/IPsec connection to the VPN server.
However, if you have to put a server behind a NAT device and then use an IPsec NAT-T environment, you can enable communication by changing a registry value on the VPN client computer. See the official Microsoft Documentation for additional information.
Security Precautions
-
Generate a different PSK for each VPN tunnel.
-
Use a password generator for the creation of your PSKs.
-
Generate long PSKs with at least 30 characters to resist brute-force attacks.
-
Send the PSK to your peer via a secure channel, such as an encrypted e-mail.
-
Enforce strong authentication for the L2TP service, e.g. DIGIPASS authentication.
L2TP Tunnel Configuration
-
Go to VPN > IPsec > Tunnels
-
Select the predefined L2TP tunnel.
-
Click on the "Edit as new" button.
-
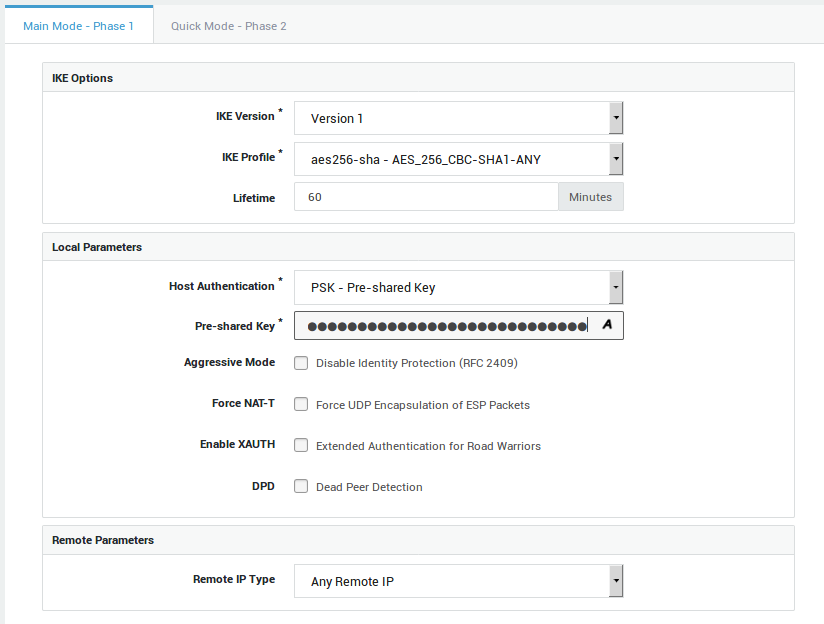
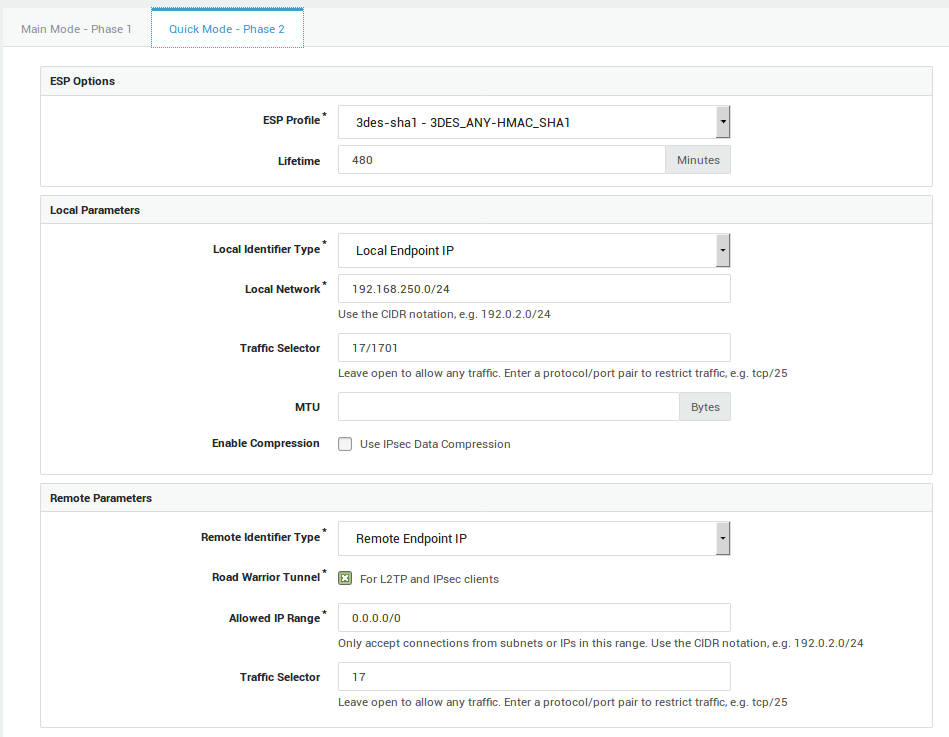
Enter the settings as shown in the screenshots below.
Phase 1
Phase 2
Enable the Tunnel

Client Configuration
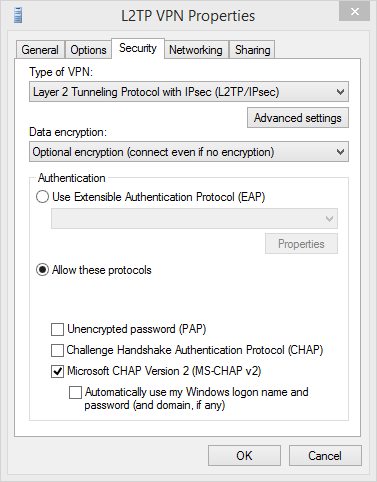
Configure the L2TP connection settings as follows:
Security
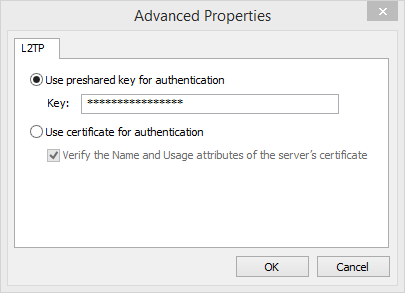
Advanced Properties
Enter the pre-shared key of the AXS Guard L2TP tunnel.