Installing the SSO Tool with a Group Policy
About this Document
In this document we explain how to install the AXS Guard SSO tool via a Group Policy. Information about the procedure described in this paper is also available on the official Microsoft support website.
This document was written for version 2.15 and was last updated on 09/28/2018.
Creating a new Group Policy
The following steps are optional; you can also edit an existing group policy.
-
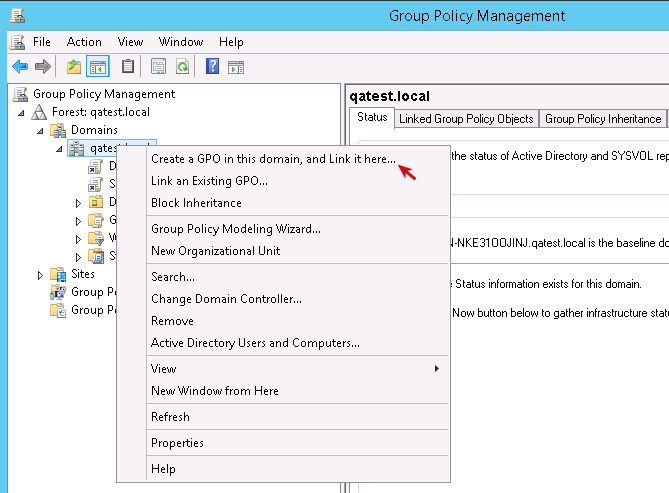
Go to Group Policy Management.
-
Expand the tree Forest:
xxx -> Domains -> <customer domain name>. -
Right-click on
<customer domain name> -> Create a GPO in this domain, and Link it here. -
Provide a name, e.g.
deploy AXSGUARDSSOv2; source (none).
Configure the SSO msi Installer
Use the included msi configuration tool for the SSO installer. It allows you to automatically create an adapted msi file for your environment based on the configured settings.
-
Run
configureMSI.hta. -
Enter the gateway hostname and make sure to check
Install for all users. -
Click on Configure Installer.
-
Copy the resulting installer,
aXsGUARDSSOv2_<gateway_ip>.msi, to a network share which can be accessed by all users, e.g.\\<your_local_fileserver>\software.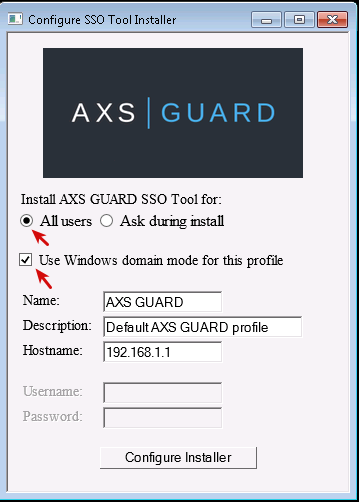
Modify the Group Policy to Deploy the Software
-
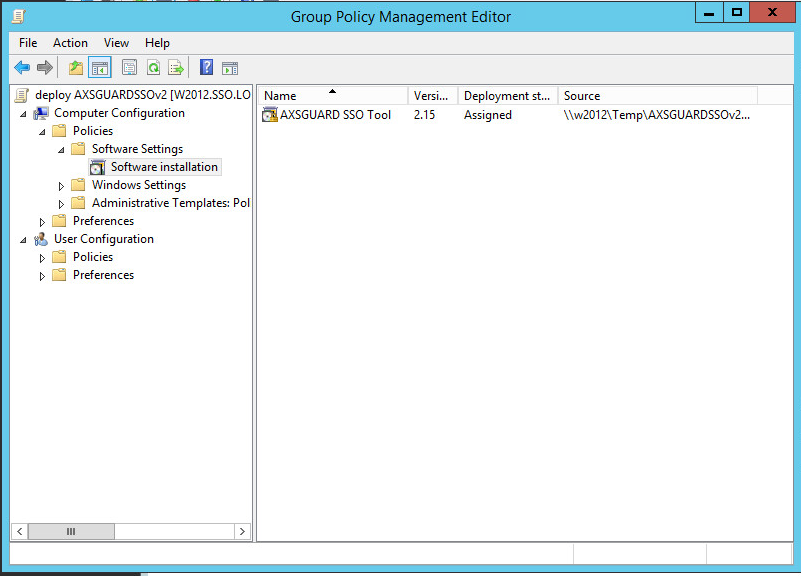
In the Group Policy Management console, right-click on the policy that you created previously. (
deploy AXSGUARDSSOv2) -
Go to
Computer configuration -> Policies -> Software Settings -> Software Installation. -
Right-click and select
new -> Package. -
Go to the network share containing the SSO Tool msi installer and select it.
-
Select
Assignedas the deployment method. -
Close the Group Policy Management Editor.
Configure the System Logon Setting in the GPO
You must enable the system logon setting in the GPO:
-
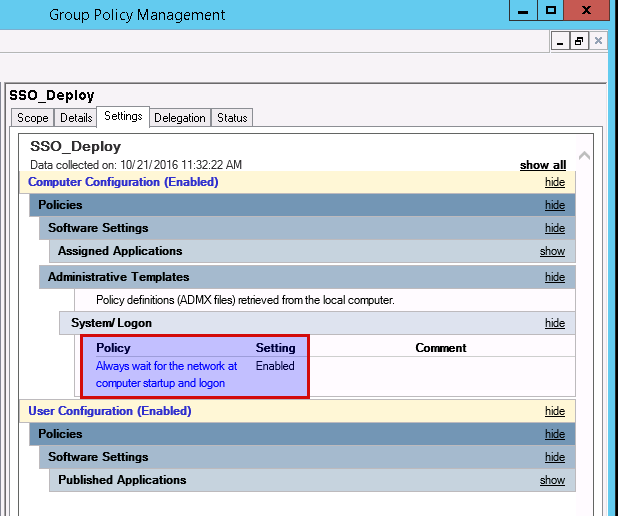
Start the Group Policy Management editor and select the GPO you created for the SSO Tool.
-
Go to Computer Configuration → Policies → Administrative templates → System → Logon
-
Enable
Always wait for the network at computer startup and logon.
Enabling this option forces Windows clients to wait until the network is fully operational.
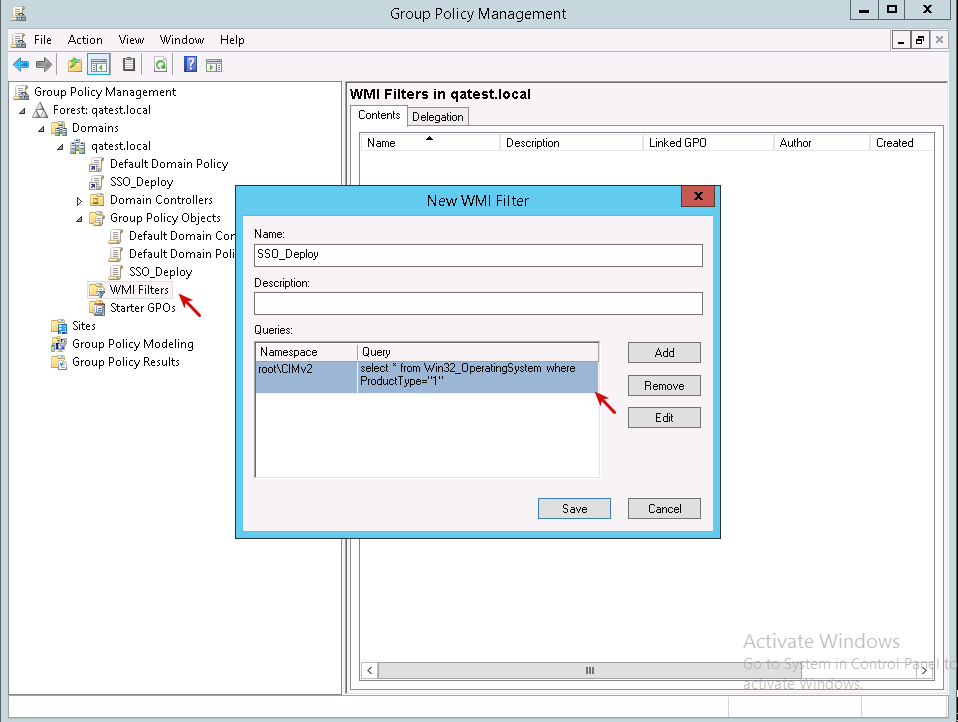
Create a WMI Filter for the GPO
Create a WMI filter to install the SSO Tool on clients only.
-
In the Group Policy Management console, got to WMI Filters and create a new filter.
-
Enter a name for the new WMI filter.
-
Add the following query:
select * from Win32_OperatingSystem where ProductType="1"
Where:
-
"1" = client
-
"2" = domain controller
-
"3" = server (other than the domain controller)
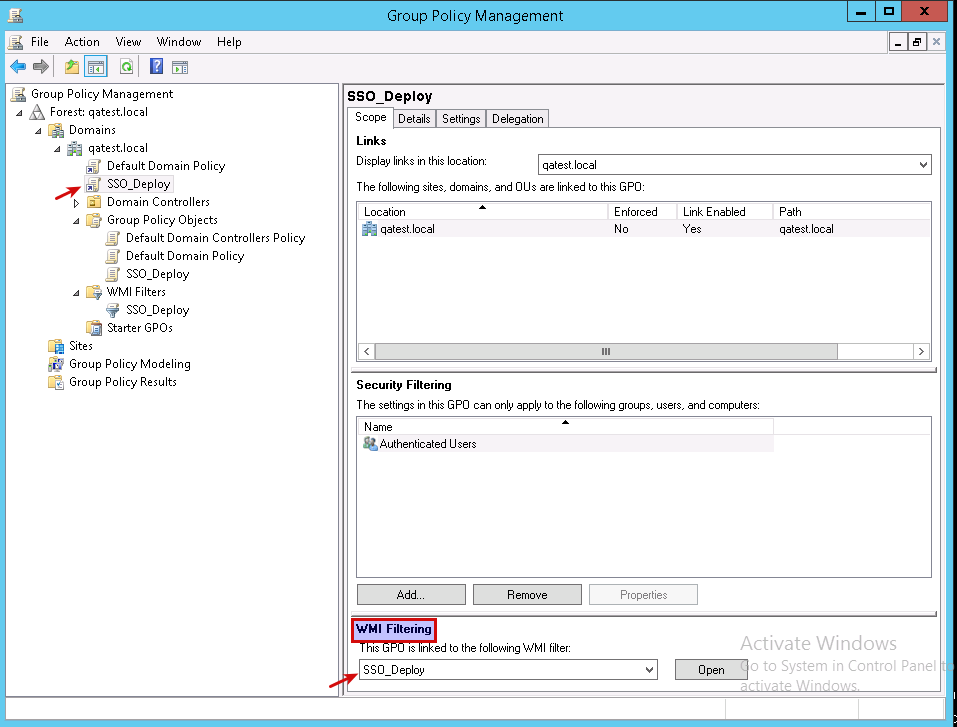
Link the WMI Filter to the GPO
-
In the Group Policy Management console, select the GPO policy you have created for the SSO Tool installation.
-
Link the WMI filter to the GPO as shown below.
Verify the Group Policy and Install
-
In the Group Poliy Manager Console, select the
deploy AXSGUARDSSOv2policy. -
Select the
Settingstab. -
Verify that the package is there.
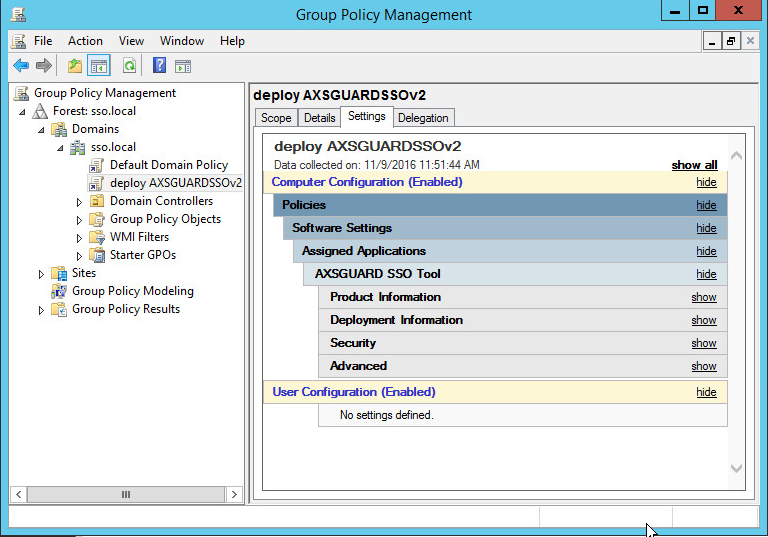
The policy is now active. The client will automatically sync with the server (typically after a few hours). The software will be automatically installed on the clients after a reboot.
You can force a group policy update on clients as follows:
-
Log in to a client machine.
-
Open a command prompt.
-
Run
gpupdate /force /boot -
Reboot the client machine to install the software.