Set up synchronization with Microsoft Entra ID
Introduction
This article explains how to synchronize Microsoft Entra ID (formerly Azure AD) users and groups with AXS Guard. After synchronization, users will be able to log in with their Entra ID credentials to access AXS Guard services, simplifying user and access management.
Requirements
- The Directory Service features must be enabled on AXS Guard.
- Entra ID application details are required for synchronization. Verify them, or register a new application.
- Entra ID application permissions must be correctly configured.
- The use of Conditional Access Policies in Microsoft Entra ID requires specific licenses.
- Note the following information:
- Domain: How to locate your primary domain.
- Tenant ID: How to find your Microsoft Entra tenant ID.
- Application ID: This is a unique identifier for an application registered within your Entra ID tenant, a.k.a. as the Client ID.
- Application secret: This secret, a.k.a. the client secret, is displayed only once, specifically when it is added to the Entra application.
Restrictions
- Only Microsoft 365 groups are eligible for synchronization; security groups are not supported.
- Entra ID email addresses must be exclusively lowercase. The presence of capital letters will result in synchronization errors.
- Group names may not exceed 25 characters. See the user and group name restrictions in the Directory Services documentation.
Useful References
| Topic | Description | Link |
|---|---|---|
| Entra ID App Registration | Guide to registering an application in Microsoft Entra ID. | Microsoft Documentation |
| Entra ID App Permissions | How to set permissions for an Entra ID application. | Microsoft Documentation |
| AXS Guard Directory Services | Understand the basic configuration and operation of AXS Guard Directory Services, including user and group management, server settings, and Microsoft Entra ID user synchronization. | AXS Guard Documentation |
Entra ID
Register an Application
- Sign in to https://entra.microsoft.com/.
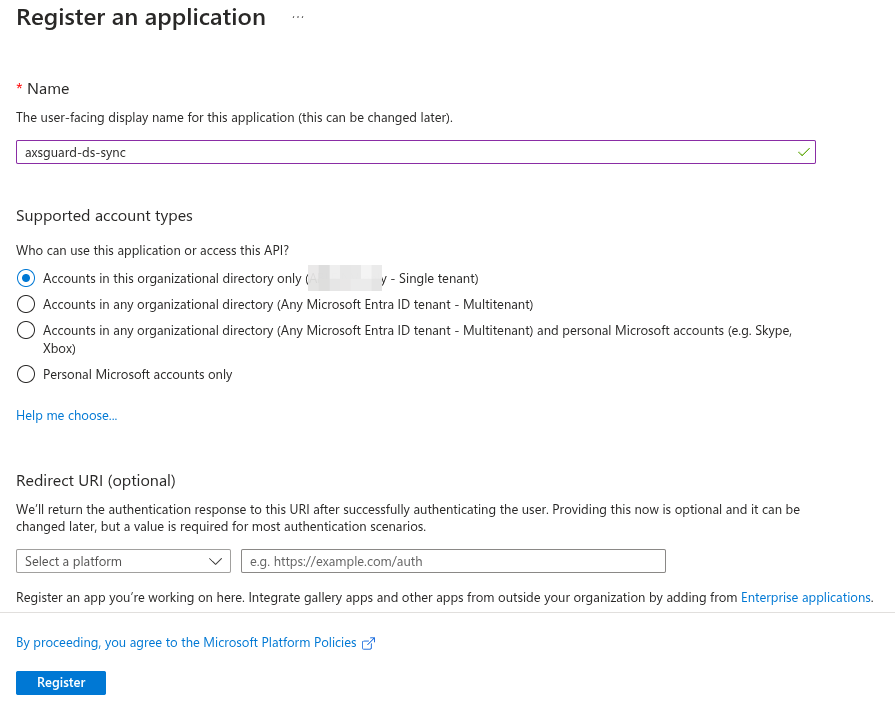
- Go to Applications > App registrations in the Entra admin center and click new registration.
-
Pick a user-facing display name, select a supported account types option. Leave the default value, if you are unsure.
-
Click register.
-
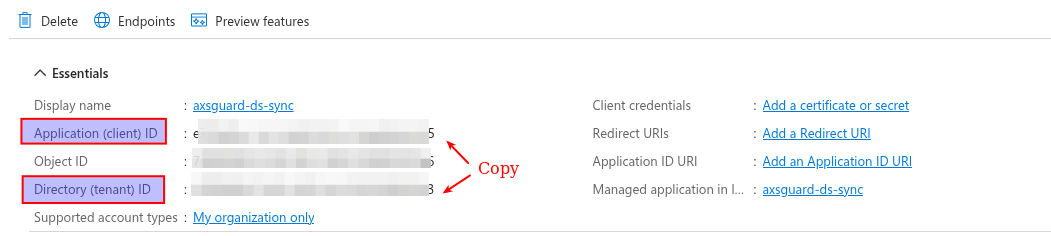
Copy the Application ID and Tenant ID. You will need these to configure AXS Guard.
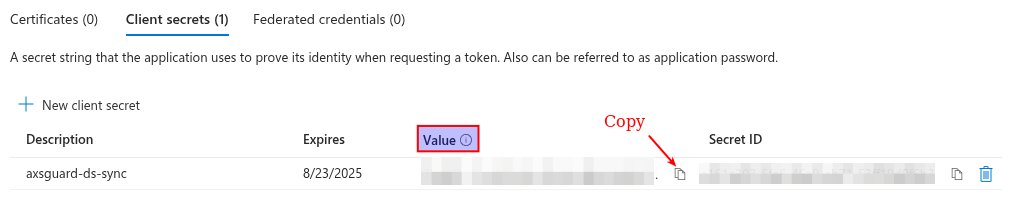
Add a Client Secret
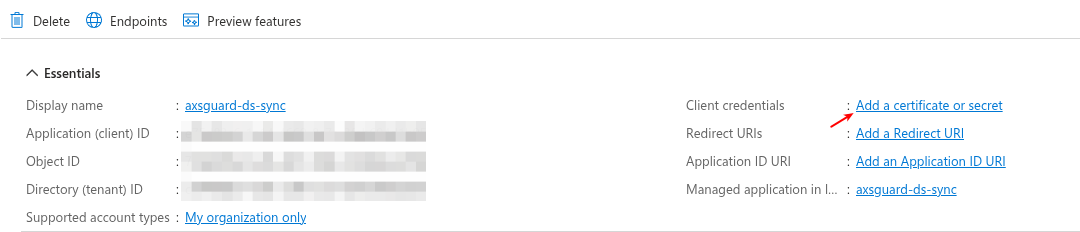
-
Once the application is registered, add a client secret.
-
Click on new client secret, enter a description, select the desired lifespan, then click on add.
-
Copy the client secret (value) you just created. You will need this to further configure AXS Guard.
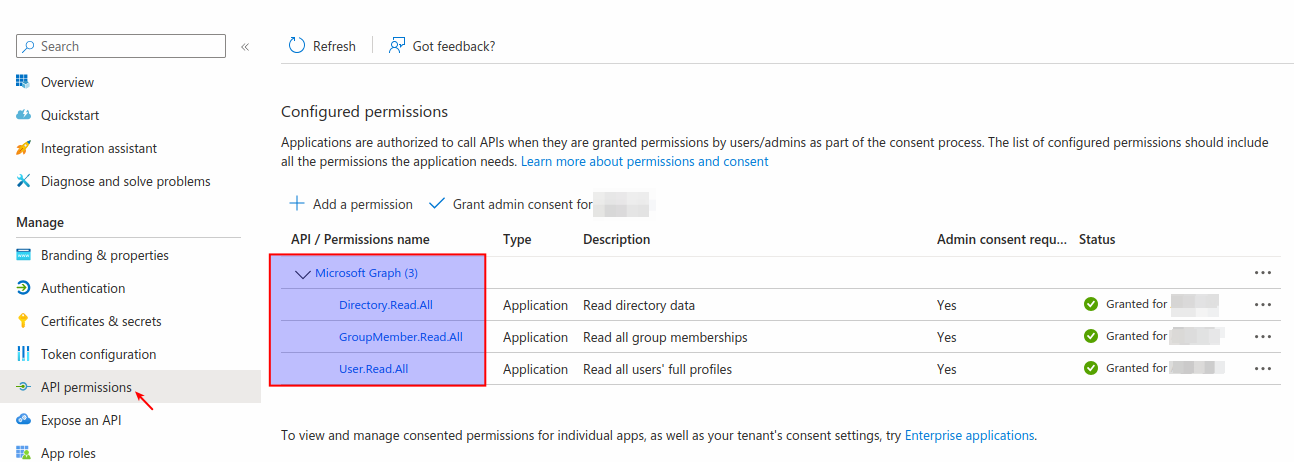
Set Application Permissions
- After adding the client secret, select API permissions.
-
Then add the following Microsoft Graph permissions:
Directory.Read.AllGroupMember.Read.AllUser.Read.All
AXS Guard Directory Service
Server Configuration
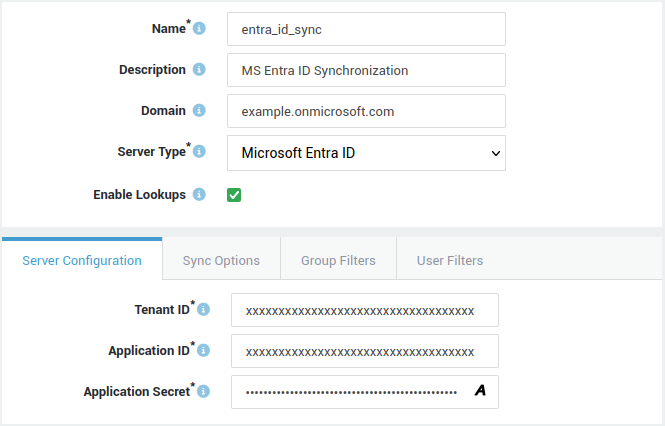
- Log in to your AXS Guard appliance.
-
Go to Directory Services > Profiles and add a new profile.
- Enter a name, description and domain.
- Set the server type to
Microsoft Entra ID. - Enable lookups.
- Enter your Tenant ID, Application ID and Application Secret.
Sync Options
Configure the desired sync options. See the context-sensitive help or Directory Services Documentation for additional information.

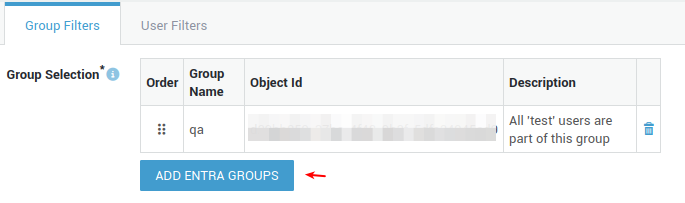
Group Filters
Add the appropriate groups. See the context-sensitive help or Directory Services Documentation for additional information.
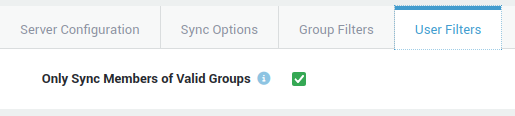
User Filters
Configure the user filters. See the context-sensitive help or Directory Services Documentation for additional information.
Sync Status
Go to Directory Services > Sync Status to verify the current synchronization state.

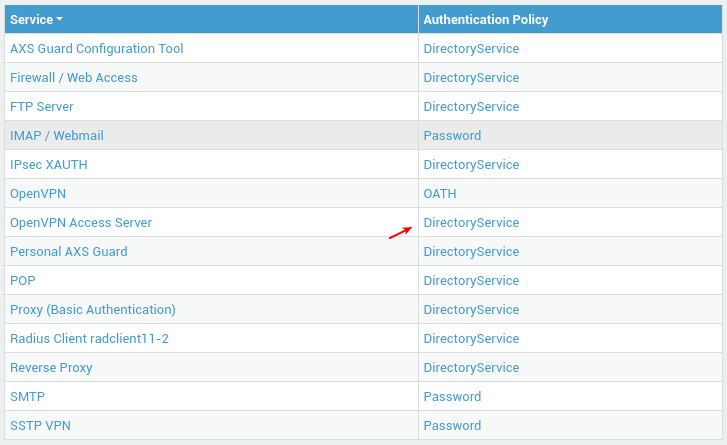
User Authentication
To activate Entra ID authentication, go to Authentication > Services, select the appropriate service and set its authentication policy to DirectoryService.