SecureDNS Agent
Introduction
The SecureDNS agent is a powerful tool designed to enhance DNS security by providing organizations with a secure and efficient means of DNS resolution.
In the ever-evolving landscape of cybersecurity threats, the SecureDNS agent plays a crucial role in safeguarding workstations from inadvertent exposure to malware, ransomware, malicious domains and botnet infrastructures.
This manual serves as a guide for users, administrators, and IT professionals on the installation, configuration, and usage of the client software.
Features
| Feature | Description |
|---|---|
| Secure DNS Resolution | Leverages a dedicated API and robust filters to ensure secure DNS queries and safeguard devices from inadvertent exposure to malware and malicious domains. |
| Logging and Reporting | Provides detailed logs for monitoring and audits. |
| Flexible Configuration | Customizable settings for diverse network environments and operating systems. The agent functions independently or integrates seamlessly with AXS Guard's DNS security solution. API configuration is done through AXS Guard Cloud. |
| Multiple OS Support | Compatible with Windows, Linux, and macOS for seamless integration. |
Requirements
| Disk Space | 150 MB (50 MB for program data, 100 MB for program logs) |
| Operating System |
All 64-bit platforms:
|
| Memory Requirements | 50 MB of free memory |
| Localhost Network |
|
| Windows Installation Directories |
|
| Network & Firewall Requirements |
|
| Software installation | Installation requires administrative privileges and a company ID. |
Downloading the Installer
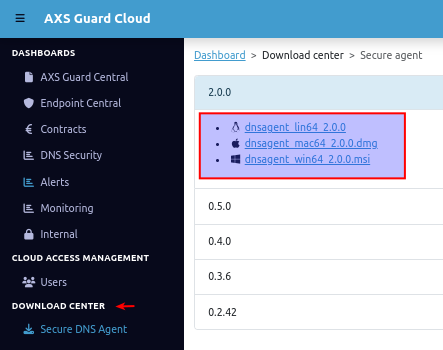
To obtain the SecureDNS installer, download it exclusively from the AXS Guard Cloud Download Center and select the suitable version for your OS.
Obtaining Your Company ID
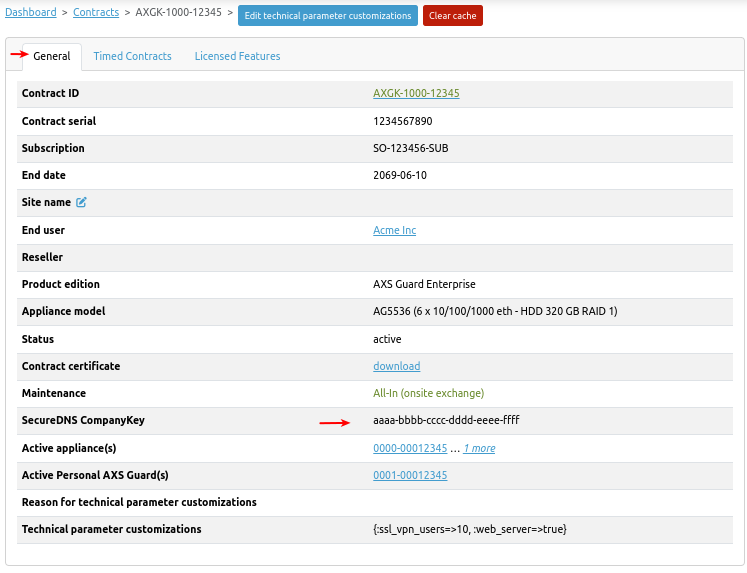
To ensure proper installation and use of the software, a company ID is necessary. This unique identifier is linked to your organization's specific license agreement. If you cannot locate a SecureDNS company ID within your contract details, please reach out to our sales team to purchase a software license.
Once you’ve located your company ID, carefully copy it. When the installer prompts you for the company ID, paste the copied information into the designated field to proceed with the installation.
Installation
Microsoft Windows
Installation Parameters
| Parameter | Description | Format & Recommendations |
|---|---|---|
| COMPANYID | Stores your unique company ID, which is required to install and run the software. | COMPANYID=x-y-z. Use this parameter for new installations. |
| USE_OLD_CONFIG (yes/no) | Determines whether or not to keep the configuration from a previous agent installation. | USE_OLD_CONFIG=yes/no. Specify yes to keep the previous configuration, no to overwrite it. |
| PROPERTY_REG_COMPANYKEY (deprecated) | Legacy parameter for COMPANYID, included for compatibility with older agents. |
PROPERTY_REG_COMPANYKEY=x-y-z Not recommended. Upgrade the agent and use COMPANYID instead. |
Installation Wizard
- Log in to Windows with a user account that has administrative privileges.
- Navigate to the folder where you downloaded the SecureDNS agent installer.
-
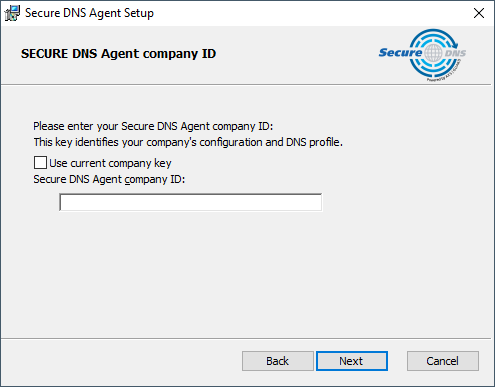
Double-click on the msi installer and follow the on-screen instructions. When prompted, copy and paste your company ID into the SecureDNS Agent Company ID field.
After completing the installation, a green or blue icon will appear in the system tray. This means that your device is protected. Refer to the SecureDNS Agent Status section for additional information.

Windows Command Line
- Open the Windows Start menu and type
cmd.exe. - Next, right-click on
cmd.exefrom the programs list, then click on run as administrator. - Go to the folder where you downloaded the installer, e.g.
cd Downloads. -
Enter the following command, providing the correct
COMPANYIDvalue.
After completing the installation, a green or blue icon will appear in the system tray. This means that your device is protected. Refer to the SecureDNS Agent Status section for additional information.

Other Installation Methods
The SecureDNS agent can be installed via a Group Policy Object or Microsoft Intune, using the following command line argument: COMPANYID=x-y-z. Substitute x-y-z with your company ID.
For comprehensive guidance on these automated deployment options, please refer to the relevant Microsoft documentation.
macOS
- Double-click the DMG file to extract the installer.
- Once the installer is extracted, click on it to start the installation.
- When prompted, copy and paste your company ID into the Company ID field.
After completing the installation, a green or blue icon will appear in the system tray. This means that your device is protected. Refer to the SecureDNS Agent Status section for additional information.
Linux
- Log in to your Linux machine.
-
Start a terminal and find the folder where you downloaded the SecureDNS agent installer.
-
Change the installer's default permissions.
-
Start the installation and follow the on-screen instructions.
-
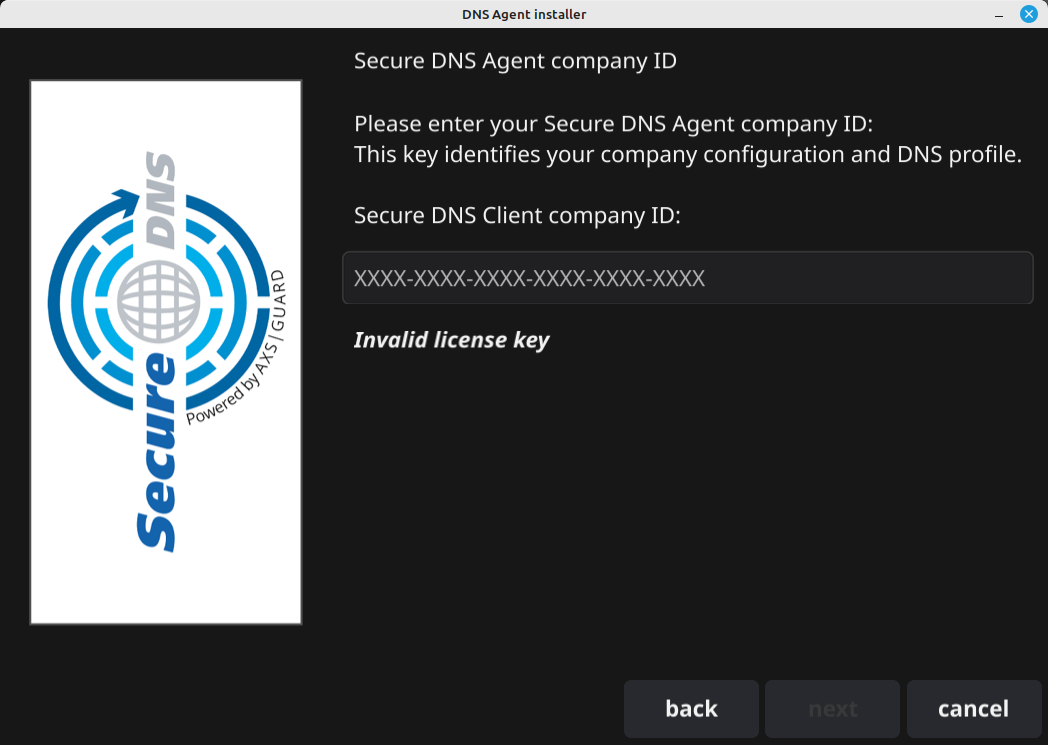
When prompted, copy and paste your company ID into the Company ID field.
After completing the installation, a green or blue icon will appear in the system tray. This means that your device is protected. Refer to the SecureDNS Agent Status section for additional information.

SecureDNS Agent Status
In this section, we explain the meaning of various icons that may appear in the system tray.
| Icon | Description |
|---|---|
 |
Your device is secured and connected to a secure AXS Guard network where DNS security has been enabled. |
 |
Your device is secured but not connected to a secure AXS Guard network; it is connected to another gateway. |
 |
A blue or green icon with a clock indicates that the SecureDNS agent is temporarily disabled by the user or has been remotely disabled via the API. |
 |
Indicates that the SecureDNS agent cannot connect to the Internet or the AXS Guard DNS Cloud. Contact your system administrator. |
Testing the Agent
Verifying Blocked Domains
You can test the agent by using the nslookup or the dig command. Use one of the following Fully Qualified Domain Names (FQDNs) to evaluate your configuration.
| FQDN | Category |
|---|---|
| test.sinkhole.secure-dns.eu | Test |
| test.axsguard.cloud | Test |
| blacklist.axsguard.cloud | Blacklist |
| phishing.axsguard.cloud | Phishing |
| botnet.axsguard.cloud | Botnet |
| apt.axsguard.cloud | APT |
| certs.axsguard.cloud | Certs |
| malware.axsguard.cloud | Malware |
| spam.axsguard.cloud | Spam |
| scam.axsguard.cloud | Scam |
| newdomain.axsguard.cloud | New Domain |
| maldom.axsguard.cloud | Malicious Domain |
| uncategorized.axsguard.cloud | Uncategorized |
~$ nslookup blacklist.axsguard.cloud
Server:     10.200.32.254
Address:    10.200.32.254#53

Non-authoritative answer:
Name:   blacklist.axsguard.cloud
Address: 195.0.83.240
Verifying a Successful Test
After a successful test, you should be able to view the blocked requests in the DNS Security dashboard by searching for the device's hostname.

Changing your Company ID
If the Company ID needs updating, run the installer, select Change Company Key, and follow the on-screen instructions. This procedure is consistent across all operating systems.

Updating the Agent
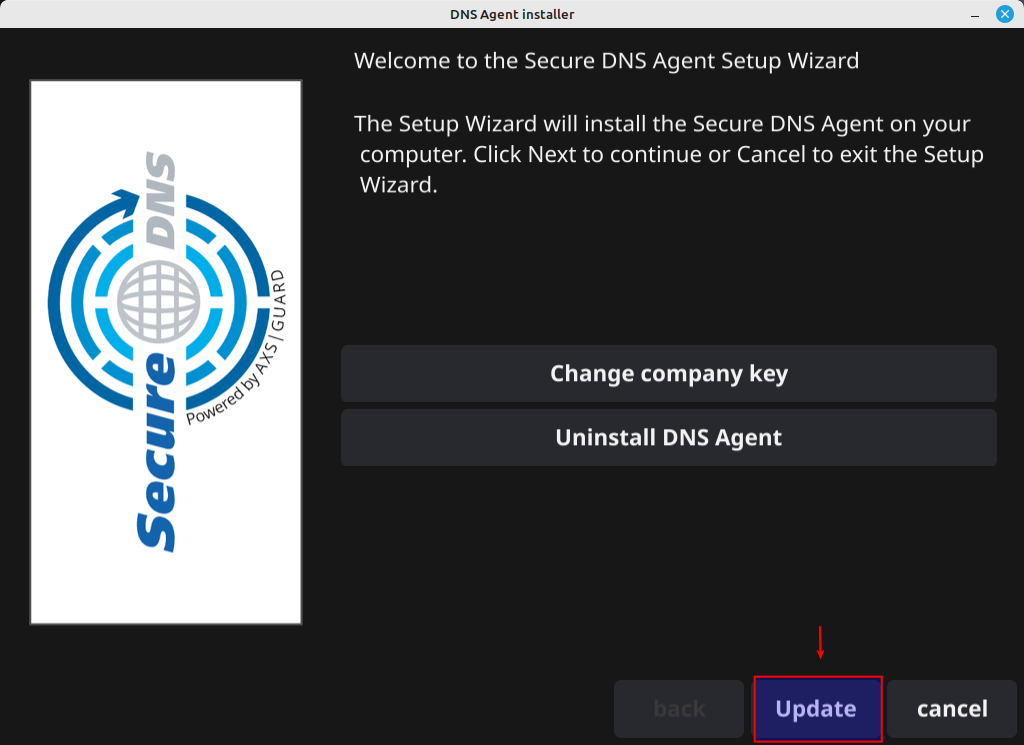
To update the SecureDNS agent to the latest version, simply download the new installer from the official source. Once the installer is downloaded, run it and click on update to install it over your current version. This will automatically replace the old version with the latest one, ensuring you have the most up-to-date features and security enhancements. No need to uninstall the previous version beforehand; the update process will handle everything seamlessly.
Uninstalling the Agent
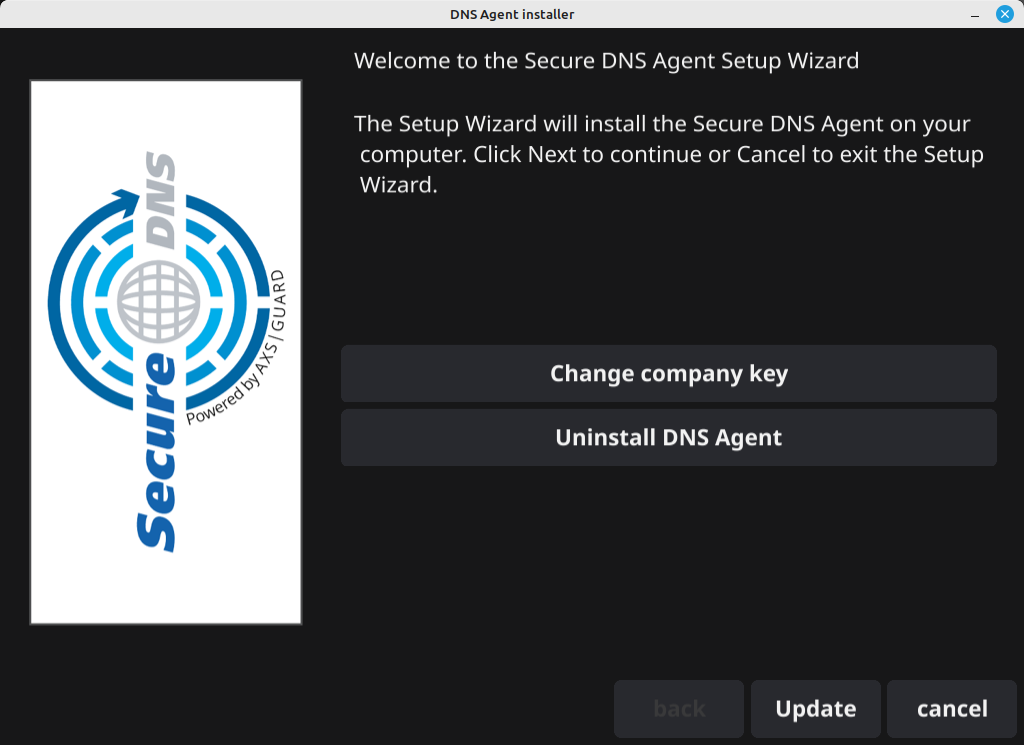
To uninstall the SecureDNS agent, run the installer, select Uninstall DNS Agent and follow the on-screen instructions. This procedure is the same for all operating systems.
SecureDNS Agent Statistics
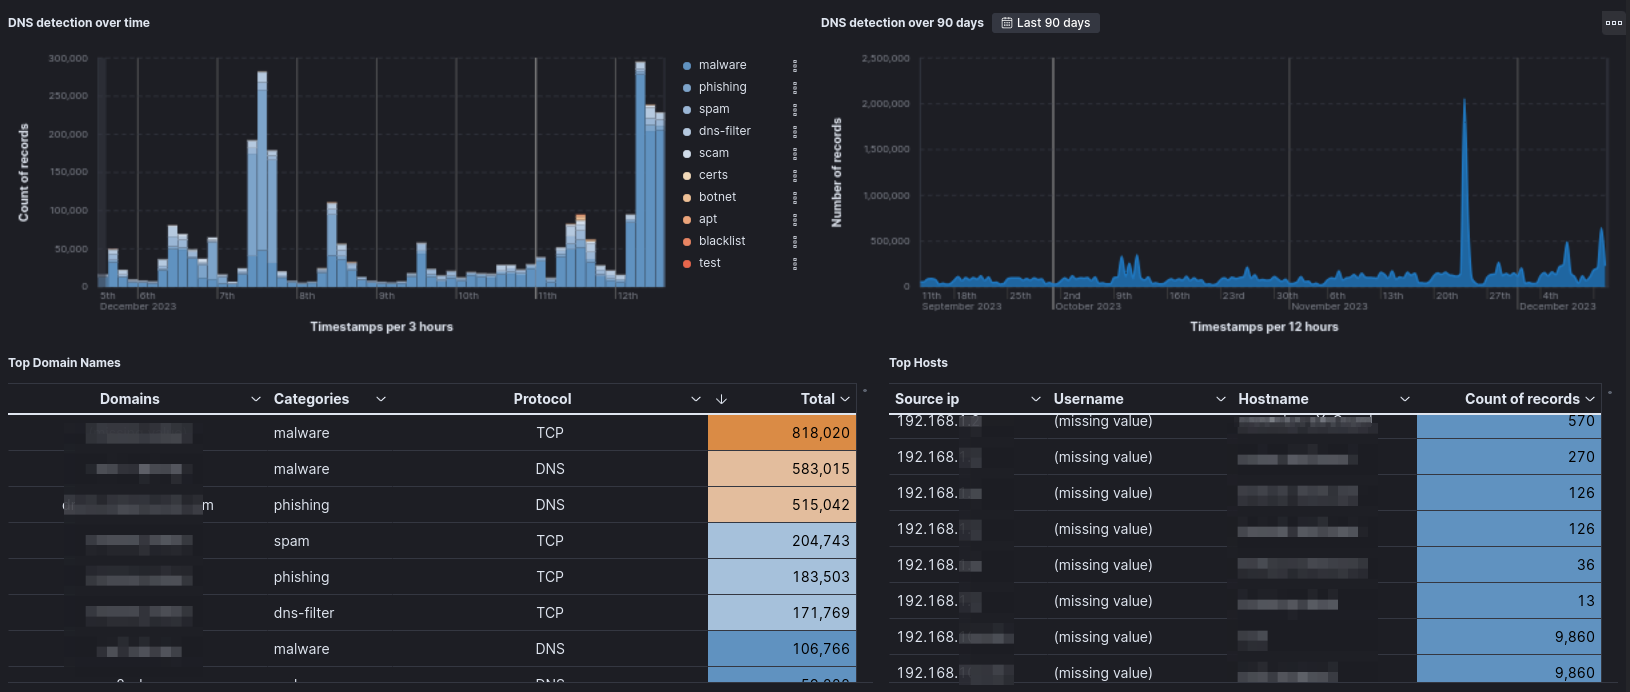
The DNS Security dashboard provides authorized administrators and MSSPs with an easy method to monitor malicious DNS traffic, facilitating quicker and more informed security decisions.
In the event of affected targets, devices can be readily identified and isolated for additional investigation or troubleshooting, enabling a more efficient adaptation of your security strategy to counter threat actors.
SecureDNS Agent Logs
The SecureDNS client-side logs serve as a valuable resource, providing detailed insights into DNS activity on individual devices and the status of the DNS agent itself.
The logs capture information such as queried domains and API response codes, offering administrators a comprehensive view of the DNS transactions and a method for troubleshooting.
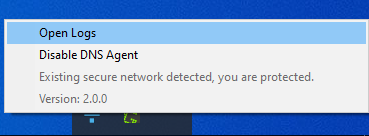
To view the logs, simply click on the tray icon and select Open logs.
Following is an example of entries that you will find in the logs:
2023/12/12 14:41:24 Debug: Using registry value for logLevel: 1
2023/12/12 14:41:24 Info: PreResolve config loaded 1 entries
2023/12/12 14:41:24 Info: Starting DNS proxy on 127.253.153.53:53
2023/12/12 14:41:24 Info: Starting DeviceSync...
2023/12/12 14:41:24 Info: DeviceSync running
2023/12/12 14:41:24 Info: License key set. Starting...
2023/12/12 14:41:24 Info: Starting DNS Setter...
2023/12/12 14:42:08 {

Version: "2.0.0",

System: "Microsoft Windows 10 Pro",

Extra: "Network Cards:
\n+--------------------------------+------------------------------------------+-------+-------+-------+-------+-------+--------------------------------+
\n|               Name             |                   GUID                   | INDEX | MET4  | MET6  | IS_UP |IS_DHCP|              DNS               |
\n+--------------------------------+------------------------------------------+-------+-------+-------+-------+-------+--------------------------------+
\n|            Ethernet Instance 0 |   {XXXXXXXX-DE43-49C7-A9C2-XXXXXXXXXXXX} |    13 |    25 |    25 |  true | false |                  10.200.32.254 |
\n|    Loopback Pseudo-Interface 1 |   {XXXXXXXX-743D-11EE-BC6A-XXXXXXXXXXXX} |     1 |    75 |    75 |  true |  true |                                |
\n+--------------------------------+------------------------------------------+-------+-------+-------+-------+-------+--------------------------------+
\n"

}
2023/12/12 14:42:08 Info: DNS Setter running
2023/12/12 14:42:08 Info: Passthrough configured for: int1.,example.local.,sub.example.com.
2023/12/12 14:42:08 Info: Updating config from server:
2023/12/12 14:42:08 Info: Updating config: disableTimeout = 120
2023/12/12 14:42:08 Info: Using 10.200.32.254:53 as DNS server for passthrough, priority: false, secureDNS: true, default: false
2023/12/12 14:42:08 Info: LogToDeviceSync: DNS Agent starting info status change
2023/12/12 14:42:12 Info: Handling network changed event. New state:
2023/12/12 14:42:12 Info: Network with secure DNS: true
2023/12/12 14:42:12 Info: Network secure DNS message: Server is protected by Secure DNS. It responded: tests.sinkhole.secure-dns.eu.
2023/12/12 14:42:12 Info: Client operational: true
2023/12/12 14:42:12 Info: Passthrough configured for: int1.,example.local.,sub.example.com.
2023/12/12 14:42:12 Info: Using 10.200.32.254:53 as DNS server for passthrough, priority: false, secureDNS: true, default: false
2023/12/12 14:42:12 Info: Setting systray icon to switch
2023/12/12 14:42:12 Info: Setting systray text to Updating local DNS config
2023/12/12 14:42:12 Info: State changed: Secure DNS: true CLIENT: true
2023/12/12 14:42:12 Info: Returning DNS to previous state
2023/12/12 14:42:15 Info: Setting systray icon to home
2023/12/12 14:42:15 Info: Setting systray text to Existing secure network detected, you are protected.
2023/12/12 14:42:15 Info: Server version: 2.0.0
2023/12/12 14:43:05 Info: User connected: DESKTOP\USER
Troubleshooting
Failed Agent Reinstallation After Cloud Instance Deletion
If you encounter a 500 Internal Server Error Authentication failure in the logs while trying to reinstall the agent after deleting its instance in the AXS Guard Cloud, follow these steps:
- Reinstall the agent.
-
When prompted by the installer, select Change company key.

-
Re-enter your company ID.
This will ensure the agent successfully registers itself with the AXS Guard Cloud.
2024/09/30 10:25:54 Error: Got response code 400 from deviceSync, expected 200. Respond message: device not valid
2024/09/30 10:25:56 Error: Unable to contact https://dnsserver-qual.axsguard.cloud (code), error: 500 Internal Server Error Authentication failure
2024/09/30 10:25:56 Error: Unable to contact https://dnsserver-qual.axsguard.cloud (code), error: 500 Internal Server Error Authentication failure
Support
If you encounter a problem
If you encounter any issues with the SecureDNS agent, don't hesitate to reach out to our technical support department.
Contact Information
(+32) 15-504-400
support@axsguard.com