WireGuard C2S Configuration
1. Introduction
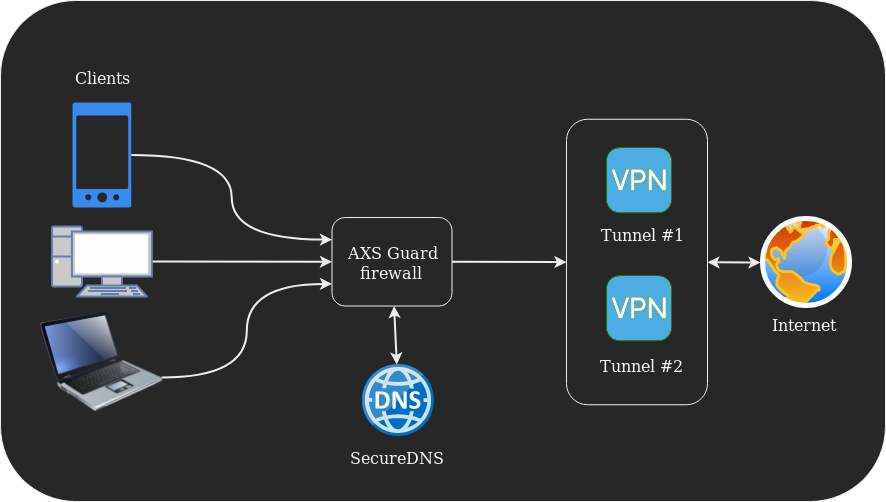
This manual provides step-by-step instructions on how to use the AXS Guard WireGuard Client Config Generator. The generator simplifies the process of creating client configurations (Client-to-Site) for remote devices connecting to your WireGuard server. This document is intended for system administrators.
2. Prerequisites
2.1 Server Side
- The WireGuard feature must be activated on AXS Guard.
- A tunnel interface must be configured and enabled.
- Allow UDP port 51820 on the AXS Guard firewall.
2.2 Client Side
- Windows / macOS / Linux
- iOS / Android
- The WireGuard app must be installed
3. Config Generator
3.1 Before You Begin
The WireGuard Config Generator creates a peer configuration that can either be manually copied as text or imported by scanning a QR code.
Important
- The Private Key generated by the config generator is not saved by the system for security reasons. Ensure you copy the configuration or capture the QR code before navigating away from the configuration page or clicking on the add client as peer button.
- To ensure the integrity of your VPN connection, the generated QR code and configuration text must be treated as highly sensitive information. This information contains a unique Private Key, which allows access to your network; therefore, it should never be shared over the Internet, posted in public forums, or sent via unencrypted email. If you need to distribute this configuration to a remote user, use a secure, end-to-end encrypted messaging service or a protected file transfer method to prevent unauthorized access.
- While WireGuard is designed for simplicity, specific configuration and installation steps may vary by client. It is recommended to consult the online manuals or documentation for your chosen client to ensure a secure and optimized setup.
- For best practices and hardening guidance, see the Security Recommendations section for WireGuard.
3.2 Generating a Configuration
- Log in to AXS Guard.
- Navigate to VPN > WireGuard > Peers.
-
Click on the Generate Client Config button.

-
Enter the required parameters, as explained in the table below.
- Manually copy the generated configuration to a file or capture the QR code. Send either one to the remote user via a secure channel .
-
Click on the add client as peer button.
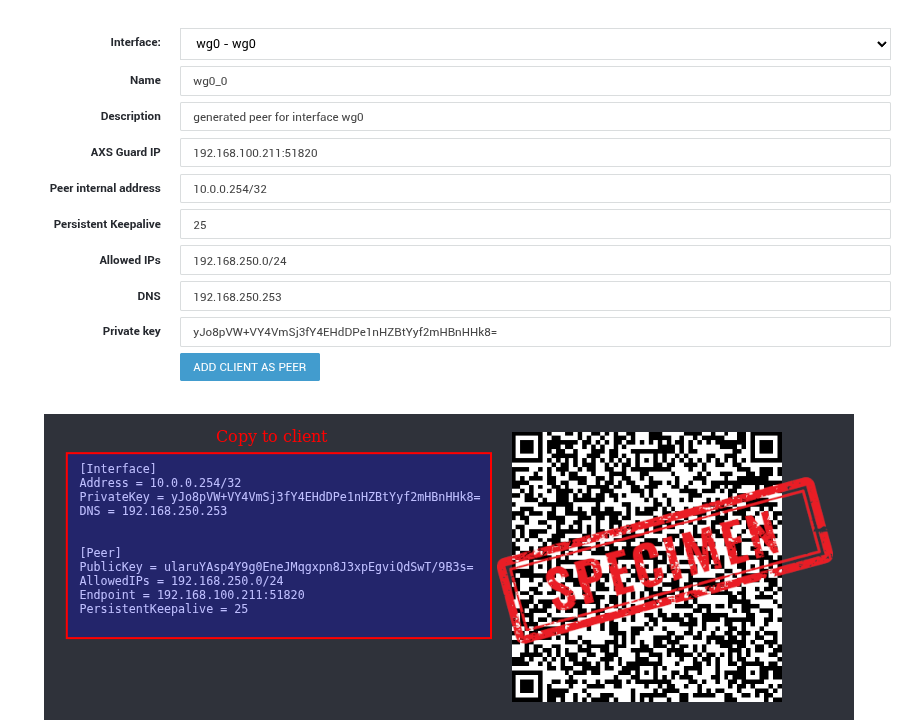
| Parameter | Example Value | Description |
|---|---|---|
| Interface | wg0 - wg0 |
WireGuard server interface to which this client (peer) will connect. Must match an active tunnel interface on AXS Guard. |
| Name | wg0_0 |
Logical name for the client peer. Used for identification on the server only. |
| Description | generated peer for interface wg0 |
Optional human-readable description of the peer. No functional impact. |
| AXS Guard IP | 192.168.100.211:51820 |
Public IP address and UDP port of the WireGuard server. This becomes the client’s Endpoint value. |
| Peer internal address | 10.0.0.254/32 |
Tunnel IP address assigned to the client. Must be unique per client (/32). |
| Persistent Keepalive | 25 |
Sends periodic keepalive packets every 25 seconds. Recommended for clients behind NAT or mobile connections. |
| Allowed IPs | 192.168.250.0/24 |
Defines which traffic is routed through the VPN. 0.0.0.0/0 enables full-tunnel routing (all traffic via VPN). Use a comma-separated list to add multiple networks, for example: 192.0.2.0/24, 192.168.0.0/16. |
| DNS | 192.168.250.253 |
DNS server pushed to the client while the tunnel is active. Typically an internal DNS resolver. |
| Private key | KOUdMp4/OFdbZdIpDoVjzMk/q0UBKk+FcSsziNFRbmY= |
Client private key generated by the system. Not stored on the server and must be saved by the client. Must be treated as highly sensitive . |
| Text configuration | 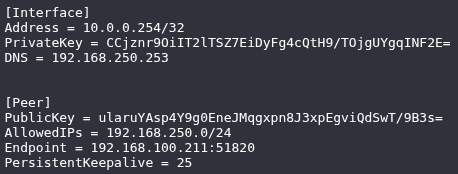 |
Import this configuration into your WireGuard client. Not stored on the server and must be treated as highly sensitive . |
| QR code |  |
QR code containing the client configuration, allowing quick import on supported WireGuard mobile clients. Not stored on the server and must be treated as highly sensitive . |
3.3 Routing
After adding the peer, generate the routes and update your configuration.
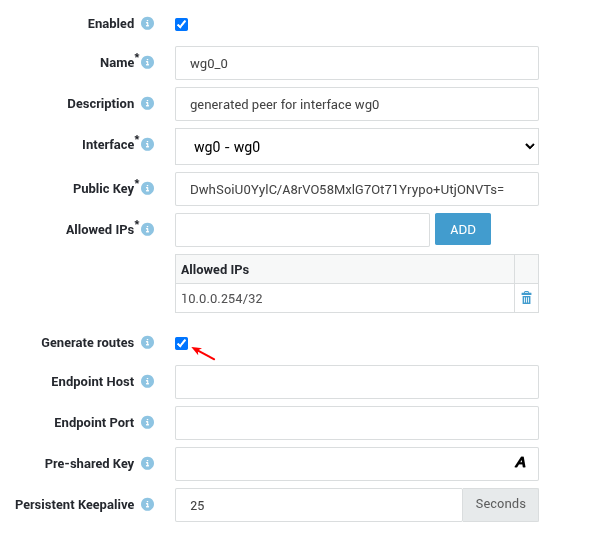
3.4 Firewall Configuration
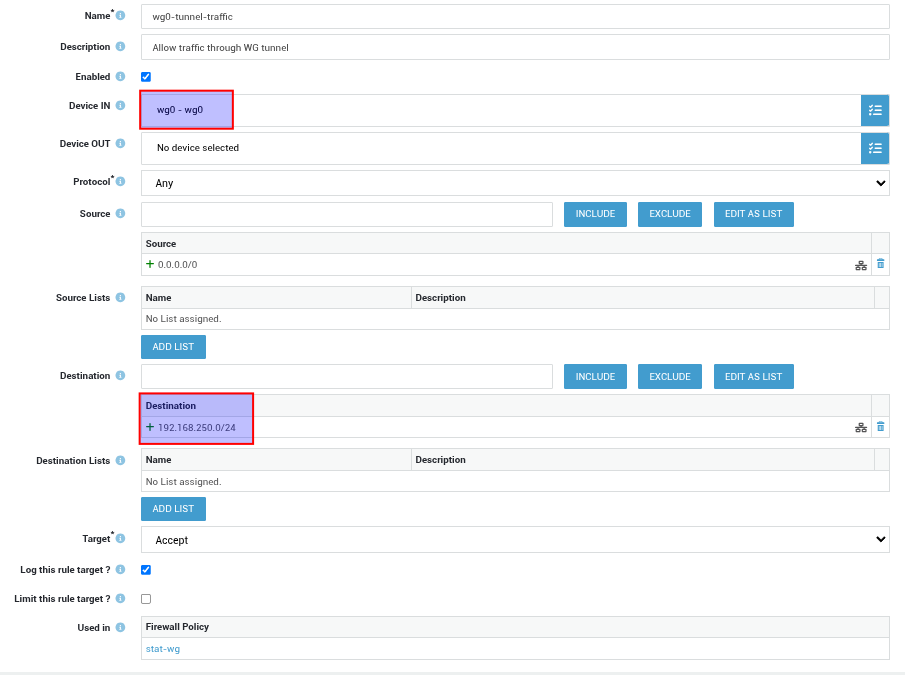
Allow traffic through the WireGuard tunnel for the allowed IPs:
- Navigate to Firewall > Rules > Through.
-
Add a new rule as shown in the example below:
-
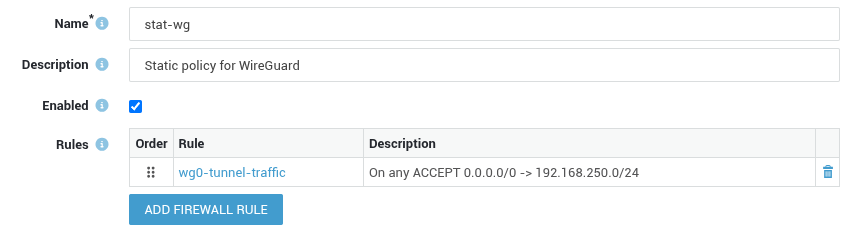
Navigate to Firewall > Policies > Static.
- Create a new policy for WireGuard, e.g.
stat-wg. -
Assign the rule created in step 2 to the policy and save your configuration.
4. Client-side Example
4.1 Software Download
- Go to https://www.wireguard.com/install/.
- Select the appropriate client for your OS.
- Install the client.
4.2 Windows Configuration
- Start the WireGuard app.
-
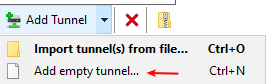
Add an empty tunnel.
-
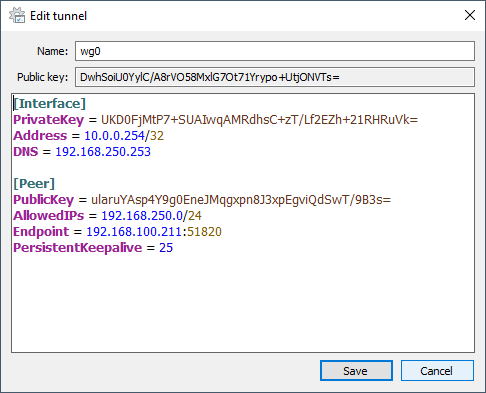
Copy and paste the generated tunnel configuration, then save your configuration.
4.3 VPN Connection Test
- In the WireGuard app, click the Activate button.
-
Open a command prompt and use the
pingcommand to verify tunnel connectivity.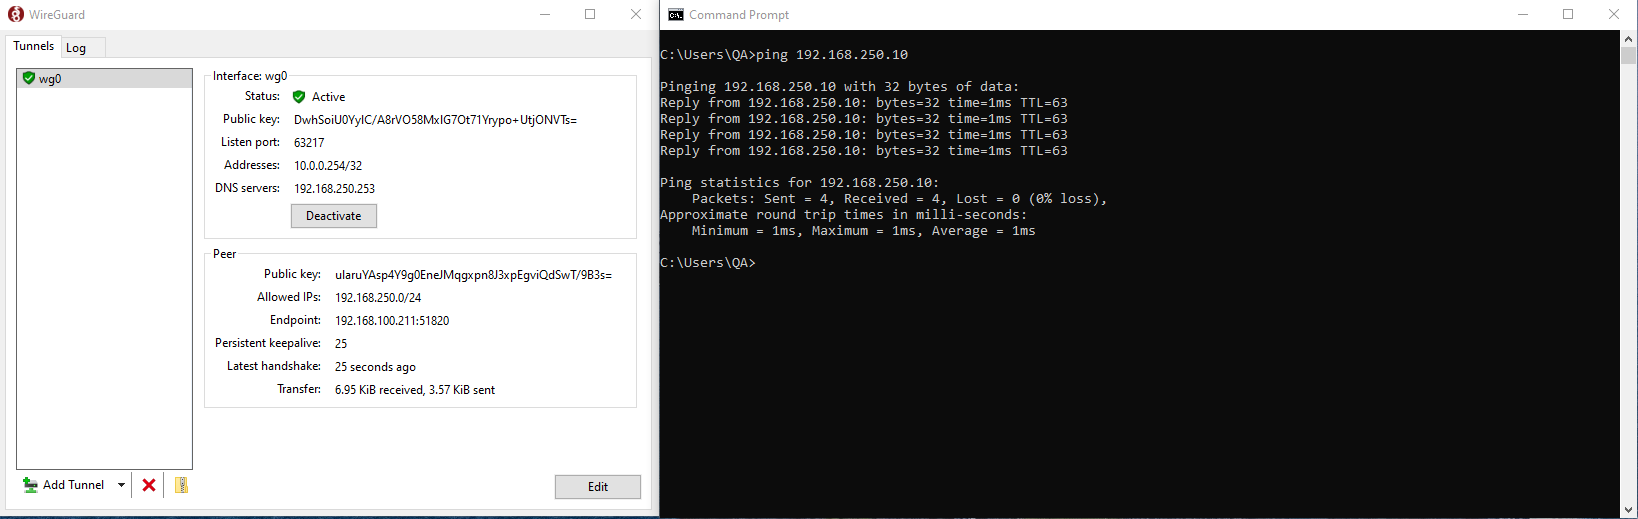
5. Support
5.1 If you encounter a problem
If you encounter a problem with AXS Guard, follow the steps below:
-
Check the troubleshooting section of the feature-specific manual.
-
Check the knowledge base on this site for information about special configurations.
-
If no solution is available in any of the above sources, contact your AXS Guard vendor.
5.2 Contact Information
(+32) 15-504-400
support@axsguard.com