Installation
Safety & Environmental Information
Read the safety information below before you install the appliance. Select a tab to see each topic.
The mains plug is used as disconnect device and it shall remain readily operable during intended use. Powering off or disconnecting the power cord while the appliance is booting or in operation may result in system damage.
-
Use the proper power cord to connect your appliance.
-
Only use a power cord which is certified in compliance with safety regulations.
-
Only use a power cord which is compliant with the AC voltage requirements in your region.
-
Before turning on the power, plug the power cord(s) into a socket which is properly grounded.
-
Before disconnecting the power supply, turn off the system.
-
Use the exact type of network cable recommended.
-
To conform to certification restrictions, only use a network cable with maximum length of 3.0 meters.
Components containing perchlorate!
This product contains (a) battery(ies), a printed circuit board (pcb) and a LCD display that may require special handling at end-of-life.
Protect the environment
Producing the AXS Guard appliance involves the extraction and use of natural resources. The product may contain substances which are hazardous for human health and the environment.
To reduce the risk of any hazardous substances being released into the environment and to reduce the depletion of natural resources, we encourage you to use appropriate recycling systems.
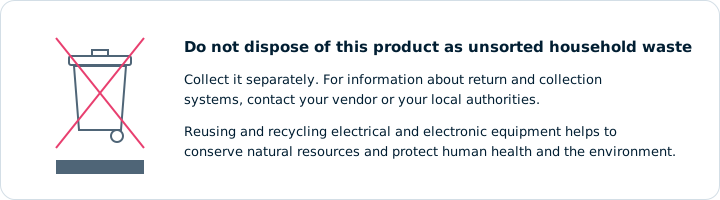
Such systems reuse or recycle most end-of-life materials in a safe way. The crossed-bin symbol invites you to use such systems. Further information on collection, reuse and recycling is available from your local or regional refuse administration center.
- Avoid back injuries. Keep your back straight and bend your knees when lifting the appliance.
- Do not lift or carry the appliance by its chassis handles. These handles should only be used to slide the AXS Guard in and out of the chassis rails.
Connecting the ETH0 Interface
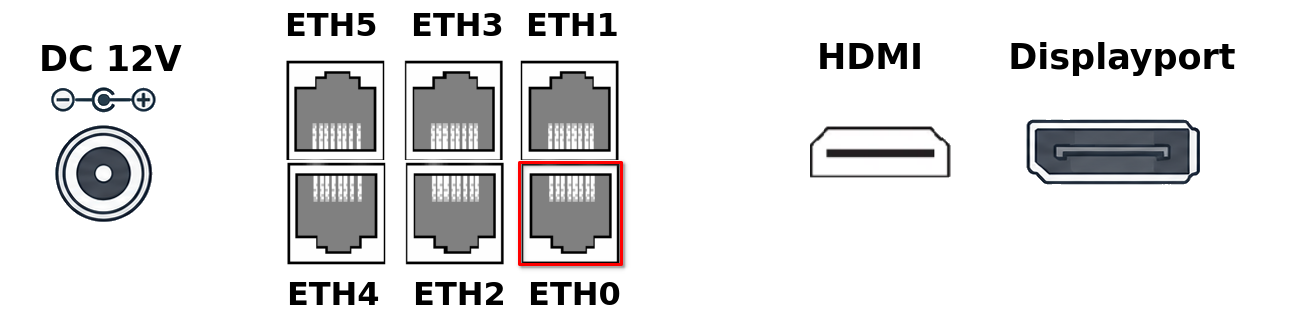
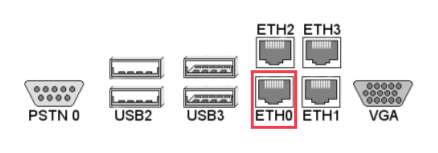
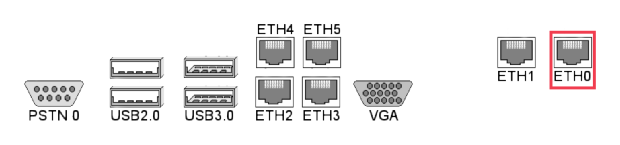
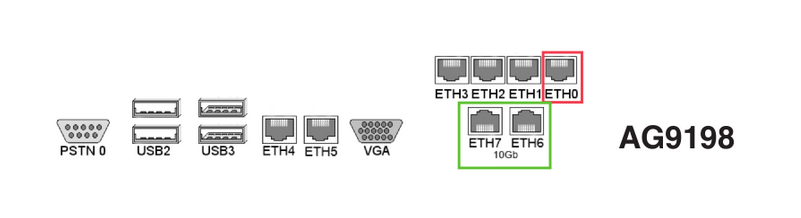
Connect the interface labelled ETH0 to your network switch. This is the default secure network interface of the appliance. Select your model below to see where ETH0 is; check the labels on your AXS Guard appliance to identify the correct network port.
Powering on AXS Guard
-
Connect the AXS Guard appliance to a power socket. Some models are equipped with two power supplies, needing a separate power cable each. Make sure to connect the power cables to separate power circuits, e.g. the main power circuit and a UPS unit. The second power supply provides redundancy in case the primary power circuit fails.
-
Power on your AXS Guard appliance by pressing the power switch once. A power LED will illuminate.
-
A green LED next to the network port where the network cable is plugged in indicates a correct network connection. If the LED is off, verify that the network cable is undamaged and securely connected to the ETH0 port.
| LED | Description |
|---|---|
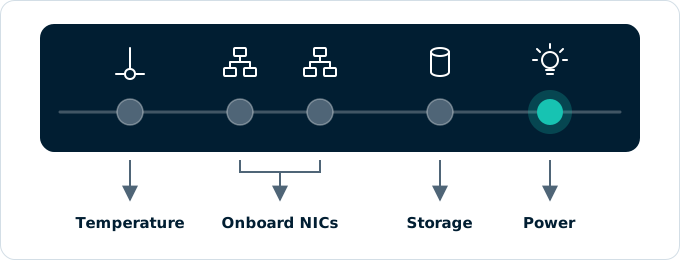
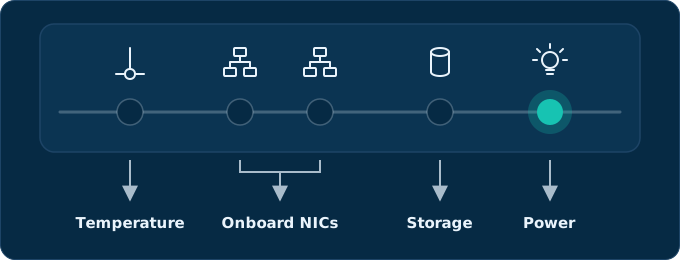
| Temperature | System is overheating and critical if illuminated or blinking. |
| Onboard NICs | Indicates the connection status of the onboard NICs. If illuminated, the NIC(s) is/are correctly connected to your network. |
| Storage | Indicates storage activity (SSD or NVMe). If this LED remains illuminated and you are unable to log in to the AXS Guard appliance, a system error has probably occurred. Log in to the console and reboot the appliance if necessary. |
| Power | Indicates that the appliance is powered on. |
Virtual AXS Guard
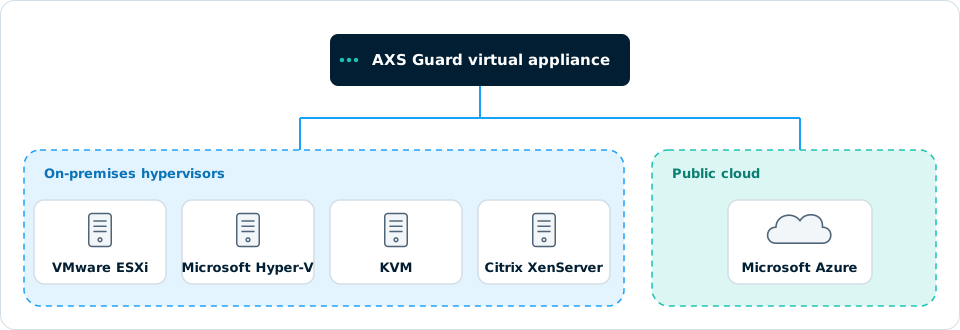
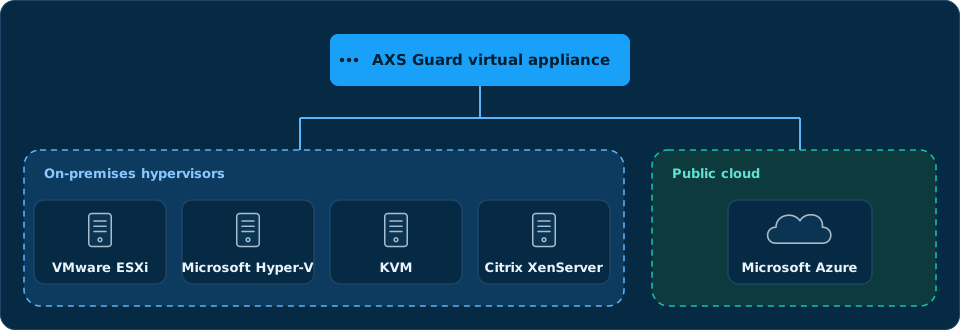
AXS Guard offers the convenience of a virtual appliance deployment option. Alongside its hardware counterpart, the virtual appliance version of AXS Guard provides organizations with flexibility in choosing the most suitable deployment method for their specific needs.
To delve into the details and gain a comprehensive understanding of the virtual appliances, see the dedicated documentation in the product manuals section.
Before you Begin
Pre-installation Checklist
Collecting the following information before you start will help to speed up your installation:
-
an unused IP address in your network
-
the Default Gateway setting in your network
-
DNS Server IP address(es) for your network
-
DNS Suffix(es) (optional)
-
the Contract Number (e.g.,
AXGK-1234-56789orEVAL-1234-56789for product evaluation), as found in your AXS Guard order confirmation. -
an appropriate network cable, with a maximum length of 3.0 meters
Important information for HA configurations
Please review our checklist for high availability (HA) and refer to the installation guide.
Factory Default Settings
Installation requires temporarily isolating a client workstation from the network and linking it to the AXS Guard appliance.
This involves changing a client workstation IP address to an address within the factory default IP address range of the AXS Guard appliance.
During first-time configuration, you will be invited to change the default IP address to match your network configuration. The client’s previous network settings can then be restored.
| Setting | Factory Default |
|---|---|
| IP address/Netmask | 192.168.250.254/24 |
| Web-based configuration tool URL | https://192.168.250.254:82 |
| Network Hostname | axsguard |
| Domain Name | domain.be |
| DHCP Server | disabled |
| Username | sysadmin |
| Password | sysadmin |
Change the factory default password
-
Changing the factory default sysadmin password is critical for security. It should be changed ASAP to prevent non-authorized users from accessing the AXS Guard administrator tool. Make sure to use a strong password. Include a combination of uppercase and lowercase letters, numbers, and special characters in your password, e.g.
!, @, #, $, %, ^, &, *. This increases its complexity and makes it harder to guess. -
Enable two-factor authentication whenever possible. It adds an extra layer of security to your accounts by requiring a second verification step.
Workstation TCP/IP Settings
A workstation must be temporarily configured so you can log in to the web-based configuration tool of your AXS Guard appliance.
- Configure your workstation with an IP address in the same range as
the factory default range of the appliance, i.e.
192.168.250.254/24. -
Once the network settings are configured and applied, open a Windows command prompt or Linux terminal and ping the appliance. The output should look like this:
C:\> ping 192.168.250.254

Pinging 192.168.250.254 with 32 bytes of data:
Reply from 192.168.250.254: bytes=32 time=2ms TTL=64
Reply from 192.168.250.254: bytes=32 time=2ms TTL=64
Reply from 192.168.250.254: bytes=32 time=1ms TTL=64
Reply from 192.168.250.254: bytes=32 time=5ms TTL=64

Ping statistics for 192.168.250.254:
    Packets: Sent = 4, Received = 4, Lost = 0 (0% loss),
Approximate round trip times in milli-seconds:
    Minimum = 1ms, Maximum = 5ms, Average = 2ms
$ ping -c 4 192.168.250.254 PING 192.168.250.254 (192.168.250.254) 56(84) bytes of data. 64 bytes from 192.168.250.254: icmp_seq=1 ttl=64 time=2.00 ms 64 bytes from 192.168.250.254: icmp_seq=2 ttl=64 time=2.00 ms 64 bytes from 192.168.250.254: icmp_seq=3 ttl=64 time=1.00 ms 64 bytes from 192.168.250.254: icmp_seq=4 ttl=64 time=5.00 ms --- 192.168.250.254 ping statistics --- 4 packets transmitted, 4 received, 0% packet loss, time 3004ms rtt min/avg/max/mdev = 1.000/2.500/5.000/1.500 ms
If a reply is received, log in to your appliance to start the first-time configuration wizard.
If a Request Timed Out or Destination Host Unreachable response is
received, please check the following:
-
Check that the workstation’s TCP/IP settings have been correctly entered.
-
Check that the network cable is in good working condition and correctly plugged into the AXS Guard eth0 device.
Once the workstation is correctly configured, the AXS Guard administrator tool can be accessed through a web browser on the workstation.
Supported Browsers
| Browser | Version |
|---|---|
| Google Chrome | Current versions only |
| Microsoft Edge | Current versions only |
| Mozilla Firefox | Current versions only |
| Safari | Current versions only |
| Opera | Current versions only |
Next Step
Continue with Configuration Wizards.