Client-Side Configuration
Before you Start
Important: Reset Button
Some PAX units are equipped with a reset button. This reset button is protected by a seal and must not be pressed. Removing or breaking the seal will immediately void the product warranty. Pressing the reset button will cause irreparable damage to the software.
Factory Default Configuration
| Parameter | Factory Default |
|---|---|
| Network | |
| PAX LAN IP Address | 192.168.1.1 |
| Netmask | 255.255.255.0 |
| DHCP Server | Enabled |
| Hostname | pax |
| URL | https://192.168.1.1 |
| Admin Login Enter the username and password in lowercase only. | |
| Username | admin |
| Password | admin |
| User Login Enter the username and password in lowercase only. | |
| Username | user |
| Password | user |
Account Types
| Account | Description |
|---|---|
admin | Provides administrative access without any restrictions. |
user | Allows users to reboot the PAX unit, use the Wake-on-LAN feature and establish a VPN connection. |
Password Guidelines
Important
- Protect your PAX unit with complex passwords to prevent users from rebooting or controlling any settings on the unit.
- Factory default passwords are overwritten as soon as a PAX unit downloads its configuration from the AXS Guard VPN server.
Mobile Internet
Compatibility
3G and 4G connectivity are supported differently across PAX variants:
| Product Variant | Mobile Internet | Supported Network Technologies | Notes |
|---|---|---|---|
| AG1497 Home Office (discontinued) | 4G LTE, 3G UMTS, GPRS/EDGE | Requires separate USB dongle; must be installed manually. | |
| AG1694 Small Office | 4G LTE, 3G UMTS, GPRS/EDGE | Requires separate USB dongle; must be installed manually. | |
| AGi200 PAX Industrial | 4G LTE, 3G UMTS, GPRS/EDGE | 3G & 4G interfaces are integrated into the unit. | |
| AG1192 Road Warrior | Not supported | N/A |
USB Dongle Installation
-
Ensure the PAX unit is powered off.
-
Remove the cover from the 4G modem.
-
Insert your SIM card into the 4G modem and reattach the cover.
-
Connect the modem directly to a USB port of the PAX unit or use a USB extension cable.
-
Power on the PAX unit and wait until it is fully booted.
-
Log in to the PAX unit to configure your mobile Internet connection.
PAX Login
Important
- Verify the proxy server settings of your Internet browser before you start. The PAX administrator tool may not be accessible if a proxy server is configured.
- After the PAX unit is fully configured and the VPN connection is established, it will become accessible through the Cyber Resilience Portal, enabling you to conveniently manage and monitor the unit as if you were directly connected to it. Please note that you must be running PAX version 4.2.0-0 or newer to use this feature.
-
Configure your client’s network interface so that it automatically receives an IP address from the PAX unit (DHCP).
-
Once your client has been assigned an IP address, verify if you can ping the PAX unit. Open a command prompt and run the following command:
ping 192.168.1.1 -
Start your favorite Internet browser and go to:
https://192.168.1.1. -
Accept the self-signed certificate.
-
Log in with the factory default credentials.
Internet & VPN
- Log in to the PAX unit.
- Select
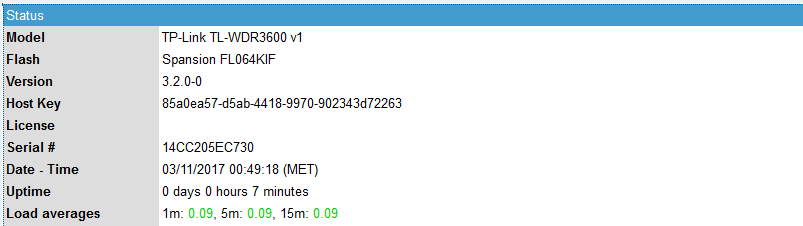
Settingsto configure your Internet and VPN connection.
Info
3G & 4G options will only appear if the PAX unit supports mobile Internet.
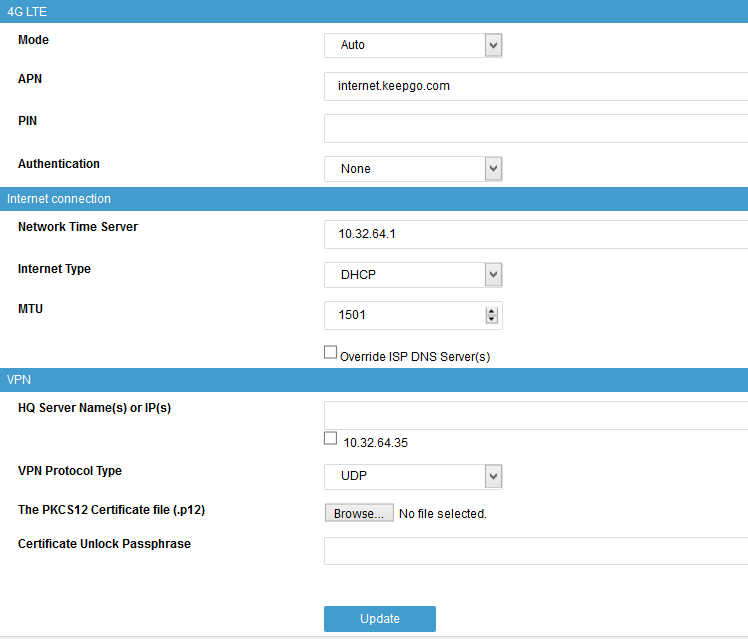
3G & 4G Settings
| Parameter | Description |
|---|---|
Mode |
Select the mode which matches your service subscription. |
APN |
Enter the Access Point Name provided by your operator, e.g. |
PIN |
The Personal Identification Number is a four-digit code to enable your SIM card once you have inserted it into your modem and is required to access your operator’s mobile network. |
Authentication |
Select the authentication protocol which matches your service subscription. |
Internet Connection
| Parameter | Description |
|---|---|
Network Time Server |
The IP address or FQDN of an Internet Time Server. |
Internet Type |
Select the appropriate method to connect to the Internet. See the information provided by your ISP. |
MTU |
The size in bytes of the largest protocol data unit that can be transmitted over the network. The system default is 1500. A table of commonly used MTUs is available online. |
Override ISP DNS Servers |
Check this option to bypass your ISP’s DNS servers. |
VPN Configuration
| Parameter | Description |
|---|---|
HQ Server Name or IP |
You can specify more than one FQDN or IP address, e.g. if the client needs a VPN connection to several sites or in a failover configuration. |
VPN Protocol Type |
|
Certificate Unlock Passphrase |
The passphrase you configured on AXS Guard to export the VPN client certificate. |
The PKCS12 Certificate file |
Upload the |
The VPN tunnel will start automatically after importing your PAX client certificate. Rebooting is allowed, but not required. The PAX unit will automatically check whether a valid client certificate is present.
Modem Status LED
| Status | Color/State | Meaning |
|---|---|---|
| Connected (Fast) | Dark Blue | 3G connection is active |
| Connected (Faster) | Cyan | 4G connection is active |
| Connected (Basic) | Green | GPRS connection is active |
| Not Connected | Blinking | Device has no connection |
Using Wake-on-LAN
The Wake-on-LAN feature is accessible to the user and admin accounts.
-
Log in to the PAX unit.
-
Select LAN in the left pane.
-
Enter the appropriate Wake-on-LAN settings and press the
Wake Upbutton.
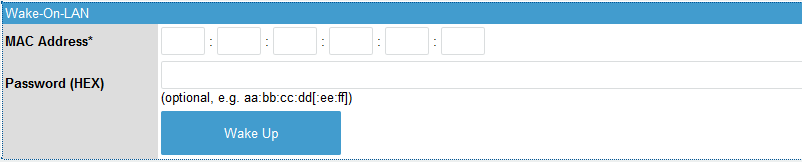
| Parameter | Description |
|---|---|
MAC Address |
The MAC address of the PC that must be able to receive magic WOL packets. |
Password (HEX) |
A four or six byte HEX password to be appended to the magic WOL packet. The NIC wakes the system only if the MAC address and password are correct. This is an optional field. |
The Wake Up button is also available in the DHCP menu. When clicked, a WOL packet will be sent to the MAC address associated with the DHCP lease.
Rebooting your PAX Unit
-
Log in to the PAX unit.
-
Click on Reboot Now.
Important
- The reboot procedure takes about 60 seconds to complete.
- After starting up or rebooting a PAX unit, wait until the power LED stops flashing.
- The DMZ LED on the front panel indicates that the booting process is still ongoing. Wait until this LED is no longer illuminated before proceeding.